Know Your Medical Tubes for Clinical Simulation, Part 2!
Today, Dr. Kim Baily shares Part 2 of her expose on Medical Tubes in Healthcare Simulation following her recent post “Know Your Medical Tubes! A 2-Part Practical Guide for Healthcare Simulation” which covered Intravenous (IV) Therapy Tubing and Intravenous Tubing. Here she covers Intrathecal or epidural device tubing, nerve block tubing, endotracheal tubes, tracheostomy tubing, oxygen tubing and more! This article continues Dr. Baily’s support of healthcare simulation technology specialists and those operating or administrating simulation programs who come from more of technical background than a medical background as complimentary reading to her series entitled “Physiology: The Force Behind Healthcare Simulation – A Guide for Techs“.
Environmental fidelity in Healthcare Simulation is crucial if learners are to suspend disbelief and become fully immersed in any given scenario. Creating realistic clinical situations includes adding various devices used for patient monitoring, fluid infusion, nutritional support, body fluid collection, and oxygen supply. New practitioners are often so focused on a single aspect of the patient’s condition that they miss significant physical abnormalities or improperly applied medical devices. Learners need to practice completing full assessments that include not only a thorough physical assessment, but also include identification of all tubes and devices attached to the patient and a thorough environmental safety assessment. Patients have been harmed because tubes have been connected incorrectly or have become displaced. Below is a list of the most common tubes used in clinical areas.
Intrathecal or epidural devices: Intrathecal administration is a route of administration for drugs via an injection into the spinal canal, or into the subarachnoid space so that it reaches the cerebrospinal fluid (CSF) and is useful in spinal anesthesia, chemotherapy, or pain management applications. Regular IV fluid and tubing should never be used for intrathecal devices. Intrathecal tubing is short and narrow (32 gauge) and is yellow striped to clearly identify the specialized tubing. Learners may miss this tubing since it may be coiled in the small of the patient’s back.
Sponsored Content:
Continuous Nerve Blocks following surgery. A continuous nerve block is done with the placement of a small flexible tube (catheter) placed next to the nerves. The catheter is then connected to a portable infusion pump to keep the area numb for 2-3 days. The pump is usually contained within a pouch. These pumps may added to simulation if they are commonly used in local hospitals.
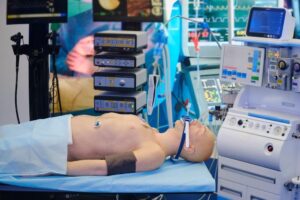
Endotracheal tubes allow passage of air from outside the body to the trachea. When placed inside the trachea, a balloon is inflated to keep the ET in place. The internal balloon is connected via a small tube to an external valve which is used to inflate and deflate the balloon. Care must be taken when changing ET ties not to accidentally cut the valve tubing. Only fully trained personnel should manipulate and clean around ET insertion sites. ET tubes are placed via the nose or through the mouth. In either case, pressure of the tube against the nares or mouth can cause ulcers so these areas should be inspected frequently. ET tubes are connected via specialized tubing to ventilators.
Tracheostomy Tubes: These tubes provide access to the lung via an opening in the trachea. They are kept in place by a balloon around the tube within the trachea. Tracheostomy sites should be cleaned regularly. Some trach tubes have reusable internal cannulas which can be removed and replaced for cleaning.
Oxygen supply tubing: Attached at one end to a face mask or nasal cannula and the other to an oxygen supply (headwall valve or oxygen cylinder). The length and width vary depending on the equipment used. The length must be long enough to not pull on the patient. The oxygen flow should be routinely checked.
Sponsored Content:
Physical Assessment devices may include blood pressure cuffs which can be set to inflate automatically, cardiac monitoring leads and oxygen saturation monitors. All devices should be checked for correct placement and to identify any irritation caused by the device.
Gastrostomy tubes/Nasogastric tubes: The purpose of these tubes is lavage (washing out/suction) or gavage (feeding). The G tube is inserted through the abdominal wall into the stomach and the NG is passed through the nose into the stomach. The NG tube must be secured in order to prevent migration to the airways and the potential for aspiration (fluid in the lungs). Placement is checked before feeding begins. Both tubes have the potential to cause irritation and skin breakdown. Some tubes are inserted into the duodenum when the stomach needs to be by passed.
Suction Tubing: Suction tubing typically runs from a nasogastric tube (NG) (nose to stomach) or gastrostomy tube (G tube) (stomach) to a vacuum. The tubing comes in various lengths and diameter of 3/16 or ¼ inch. Learners should check that the suction is on if ordered. Suctioning may be intermittent or continuous depending on the order.
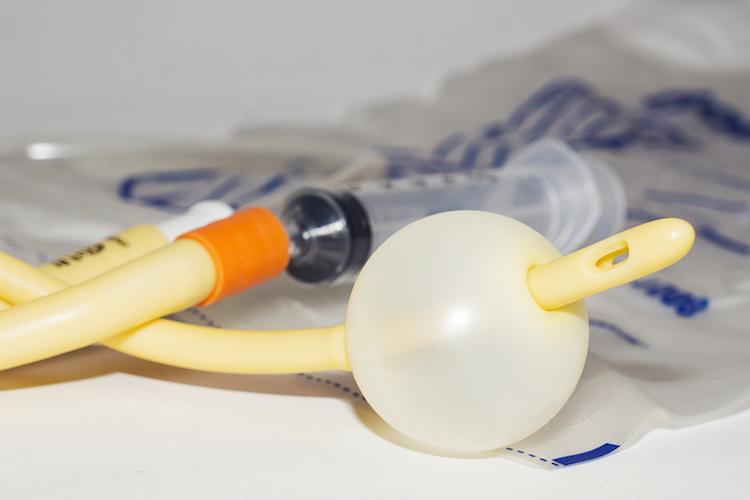
Urinary catheters for drainage and irrigation. Catheters are inserted into the bladder to enhance urinary eliminated or to accurately measure output. AKA Foley catheters. Typically the catheter has two lumens, one to collect urine and another connected on the outside to a port with a valve and on the inside of the bladder to a balloon. Once the catheter is placed, the balloon is inflated with 5-10 mL fluid. The balloon keeps the catheter in place. Catheters must be secured to the leg to prevent pulling on the urinary meatus and erosion. Catheters should never be left to dangle unsupported. Bladder catheters with 3 lumens may also be used for irrigation following surgery such as prostate resection. Note, when the catheter is placed following prostate or other urinary tract surgery, the balloon is bigger (around 30mL). Normal saline (0.9% sodium chloride) is slowly run through the bladder via IV tubing from a pump to prevent blood clot formation.
Wound drainage tubes, collection devices and vacs: See future article for details!
Chest tubes: A chest tube is a hollow, flexible tube placed into the chest. It acts as a drain to collect blood, fluid, or air from around the lungs, heart, or esophagus. The tube is placed into the space between the inner and the outer linings of the chest cavity. It is connected to suction via a specialized connection device.
Intracranial Pressure Monitoring: Intracranial pressure (ICP) monitoring uses a device placed inside the head. The monitor senses the pressure inside the skull and sends measurements to a recording device.
T tubes: T Tubes are placed in the common bile duct after Common Bile Duct (CBD) exploration or removal of the gallbladder. The tube provides external drainage of bile into a controlled route while the CBD heals. The insertion point of the T tube should be checked for leakage or bleeding. The tube should never be allowed to kink since this could lead to back of bile into the liver.
So many tubes! Time is limited for simulation set up but by adding one or two appropriate devices that match the objectives of the simulation, learners will be able to practice evaluating the environment. Situation awareness is a key component in keeping patients safe. When multiple groups of students will use the same scenario, vary the simulation setup slightly by deliberately changing some of the devices. For example:
- Switch tube feeding to IV site or vice versa.
- Use intrathecal tubing for IV or vice versa.
- Turn off suction or oxygen.
- Have expired tubing.
- Dislodge urinary catheter or any tubes that should be attached.
- Fill urinary catheter collection bag.
- Close the roller clamp on the piggyback to deliberately block the piggyback infusion. (Note, some smart pumps alarm when the piggyback roller clamp is closed).
Additional Reading: Cancer.org has a great breakdown of tubing entitled “How Tubes and IV Lines Are Used During Cancer Treatment“, and remember to check out Part 1 of Dr. Baily’s Tubing Guide for Healthcare Simulation!
Subscribe to Our Free Newsletter for More Great #Sim Resources!
About the Author: Today’s article was guest authored by Dr. Kim Baily PhD, MSN, RN, CNE, previous Simulation Coordinator for Los Angeles Harbor College and Director of Nursing for El Camino College. Over the past 16 years Kim has developed and implemented several college simulation programs and previously chaired the Southern California Simulation Collaborative.
Have a story to share with the global healthcare simulation community? Submit your simulation news and resources here!
Dr. Kim Baily, MSN, PhD, RN, CNE has had a passion for healthcare simulation since she pulled her first sim man out of the closet and into the light in 2002. She has been a full-time educator and director of nursing and was responsible for building and implementing two nursing simulation programs at El Camino College and Pasadena City College in Southern California. Dr. Baily is a member of both INACSL and SSH. She serves as a consultant for emerging clinical simulation programs and has previously chaired Southern California Simulation Collaborative, which supports healthcare professionals working in healthcare simulation in both hospitals and academic institutions throughout Southern California. Dr. Baily has taught a variety of nursing and medical simulation-related courses in a variety of forums, such as on-site simulation in healthcare debriefing workshops and online courses. Since retiring from full time teaching, she has written over 100 healthcare simulation educational articles for HealthySimulation.com while traveling around the country via her RV out of California.
Sponsored Content:
