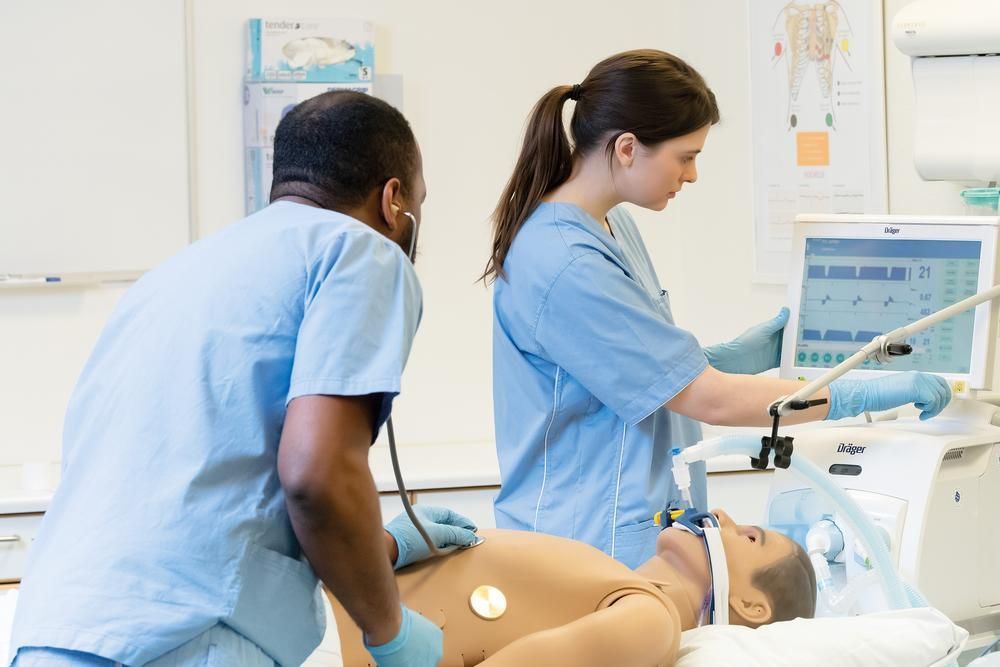
An abbreviation for “Suction-Assisted Laryngoscopic Airway Decontamination Simulator,” a SALAD Simulator is a means through which learners can gain airway skills practice. This clinical simulator can help better prepare learners prepare for the field by employing a simulation resource that is not frequently used during practice. Developed by James Ducanto, M.D., this technique can be used to manage a massively soiled airway – including even the most copious secretions. This HealthySimulation.com article further explains what a SALAD Simulator is, how the innovation works, and how healthcare simulation educators can make one of their own.
To perform this technique, leaders need a dedicated manikin, such as a Lifeform airway manikin. Typically, the manikin is low budget and low fidelity, vomiting to simulate airways that inhibit a patient from sleeping – such as GI bleeds, alcohol overdoses, etc.
As these manikins are less expensive, the hope is that SALAD Simulator use will be able to expand the number of learners engaging in EMS simulation. There are variations in the materials to be used and how to create a SALAD Simulator, but Ducanto’s version remains the most well-known.
In a Tweet, Anand Swaminathan, MD, MPH, FACEP, an assistant clinical professor of Emergency Medicine at St. Joseph’s Hospital in Paterson, NJ., summarized the SALAD process as first leading with suction to decon. Next, the blade should be placed and the learner should move the suction cath to the left of the blade (Park suction). Lastly, the suction should continually clear the airway.
Intubation Pearls @jducanto + SALAD technique (Suction Assisted Laryngoscopy for Airway Decontamination)
1) Lead w/ suction to decon
2) Place blade
3) Move suction cath to left of blade (Park suction)
4) Suction continually clears airway#EEM2018 pic.twitter.com/S5tzsoFdnB— Anand Swaminathan MD MPH 🏳️🌈🇺🇦 (@EMSwami) May 16, 2018
In the article “How to make your own airway management SALAD simulator,” Kelly Grayson, NRP, CCP author of The Ambulance Driver’s Perspective, shares that he converted his Laerdal Adult Airway Management Trainer (aka, Fred the Head) to a SALAD simulator using Dr. Ducanto’s instructions. He adds that he discovered a few tweaks that make the conversion easier, cheaper, and “less messy.” With one exception, he bought his parts at the local Lowe’s. Grayson warms that numbers may be different at each person’s local retailer, but shares what he believes need simulationists would need to build their airway management SALAD simulator:
- Set of washing machine hoses (Lowes #551720): $22.98
- 2’ length of ¾” CPVC (hot water) pipe (Lowes #832011): $2.39
- ¾ CPVC female threaded adaptor (Lowes #23754): $1.38
- All-purpose pipe cement (Lowes #23541): $6.93
- ¾ brass threaded male/male hose fitting (Lowes #877064): $4.58
- ¾-1 ½” stainless steel hose clamp (Lowes #80887): $2.28
- ¾” threaded brass hose bibb (Lowes #867976): $6.78
- Plastic drill-powered pump (Lowes #138026): $8.99
- Teflon thread tape (Lowes #456831): $3.98
- Variable speed electric drill (Lowes #619208): $29.98
- 5-gallon plastic carboy with cap (Amazon #45-56Y8-E2FR): $16.39
- Xanthum gun or sodium alginate (1 pound, price varies): $25.00
Total: $131.66
Next, Grayson explains how to build the SALAD Simulator. He says that slightly deviating from Dr. Ducanto’s instructions, he did not employ the garden hose quick connects and the clear plastic tubing, as well as the table lamp dimmer and the wireless on/off switch. Instead, he suggested that the clear plastic tubing (and the male/female hose repair connectors necessary to link it all together) can be replaced with washing machine hoses. Using these materials, he used the following steps to build the clinical simulator:
- Cut ¾” CPVC pipe down to 3”
- Prep surface of pipe and fitting, then using pipe cement, glue ¾” CPVC female adaptor to the 3” length of pipe
- Using thread tape, screw the ¾ brass threaded male/male hose fitting into the female pipe fitting securely
- Remove the stomach bag from the esophagus of the airway simulator. Slip-free end of the pipe into the clear plastic esophagus of the airway manikin, secure in place with hose clamp (this is totally reversible, you can remove at any time, the hose clamp merely secures the CPVC fitting to the esophagus without leaks)
- Attach washer hoses to hose fitting on manikin and drill pump
- Drill out ¾ threaded punch-out in the screw cap of the carboy, taking care not to damage the threads. Remove the small cap over the vent, drill a small hole for a vent and replace the cap
- Wrap threads of brass hose bibb with Teflon tape, screw securely into ¾ threaded hole in the cap of the carboy, fill carboy with the required amount of water, replace the cap
- Attach the free end of the hose to the hose bibb. Open the valve and allow gravity to prime the system
- Secure pump into the drill chuck
- Squeeze the trigger on the drill, and voila! Vomit volcano!
Throughout the remainder of his article, Grayson shares a vomit recipe and instructions for disassembly and cleanup as well. His expertise in this subject stems from his work as a critical care paramedic in Louisiana. He has spent the past 24 years as a field paramedic, critical care transport paramedic, field supervisor, and educator. Grayson is president of the Louisiana Society of EMS Educators and a board member of the LA Association of Nationally Registered EMTs and is a frequent EMS conference speaker and contributor to various EMS training texts.
In another article on Croaker’s EMS Blog, titled “The Vomitkin and Me. A Love Story,” the author shares how he build his own SALAD Airway Trainer (AKA the Vomitkin). He began with a Laerdal Airway Skills Trainer (“Fred the Head”) and removed the old lungs. Then he took a single Bicycle inner tube and cut it in half, one for each lung. With a simple connection elbow, he connected the “Main Stem Bronchi” friction tight, as he wanted to be able to easily remove them. Then he applied “Shoe Goo” to the inside of the inner tube and then a metal clamp to the outside to create a seal. Read his full article for all of the steps he took to create his SALAD Simulator.
Here are other examples of SALAD Simulators in use:
@jducanto made our own SALAD trainer! Nicknamed “the vomiquin”. Emerald green vomit today #FOAMed pic.twitter.com/26qlcErxav
— p. (@drjohnpester) September 19, 2015
#smaccAirway VomiQuin simulation, SALAD trainer #SMACCUS pic.twitter.com/xzQHR9oFgF
— Yen Chow (@TBayEDguy) October 2, 2015
Homegrown innovation happening at @upmcem yesterday – introducing the Vomitkin built by PGY2 Dan Schloss! So many valuable techniques to control the messiest of airways. Plus he served doughnuts while teaching SALAD with fake vomit…. yum? ;). #EMConf pic.twitter.com/XW9Gh6CNyd
— Emily Brown (@EmilyBrownEM) January 29, 2021
SALAD Simulator Product Example
3B Scientific SALAD Simulator: This SALAD Simulator uses suction to enhance first pass success-laryngoscopy (FPS-L) with a non-anesthetized patient in active emesis. The clinical simulation solution simulates a non-anesthetized patient for practicing intubation, ventilation, and suction, and allows learners to practice oral, digital, and nasal intubation, as well as E.T., E.O.A., P.T.L, L.M.A., Combitube, and King System insertion. The 3B product includes “Airway Larry” Adult Airway Management Trainer Head, suction canister with 2 right-angle tubing adapters, gallon container with hand pump, two simulated latex-free lungs, thickener, rigid suction catheter, two 3-ft. lengths of clear vinyl tubing, pump spray lubricant, 5 red caps with white fittings, tubing couplings, 5 pinch clamps, and a #10 spanner bit and carrying case with handle.